Top 3 Garden Tools for Seed Starting

Top 3 Garden Tools for Seed Starting
While sales are rolling, now is the perfect time to snag some deals on the best garden tools or add some to your Christmas Wishlist! Today’s focus is on tools for starting seeds and transitioning seedlings outside. Let’s break this list down into 2 parts – budget and my experience of “the best.”

Garden Tool #1: Growing Trays
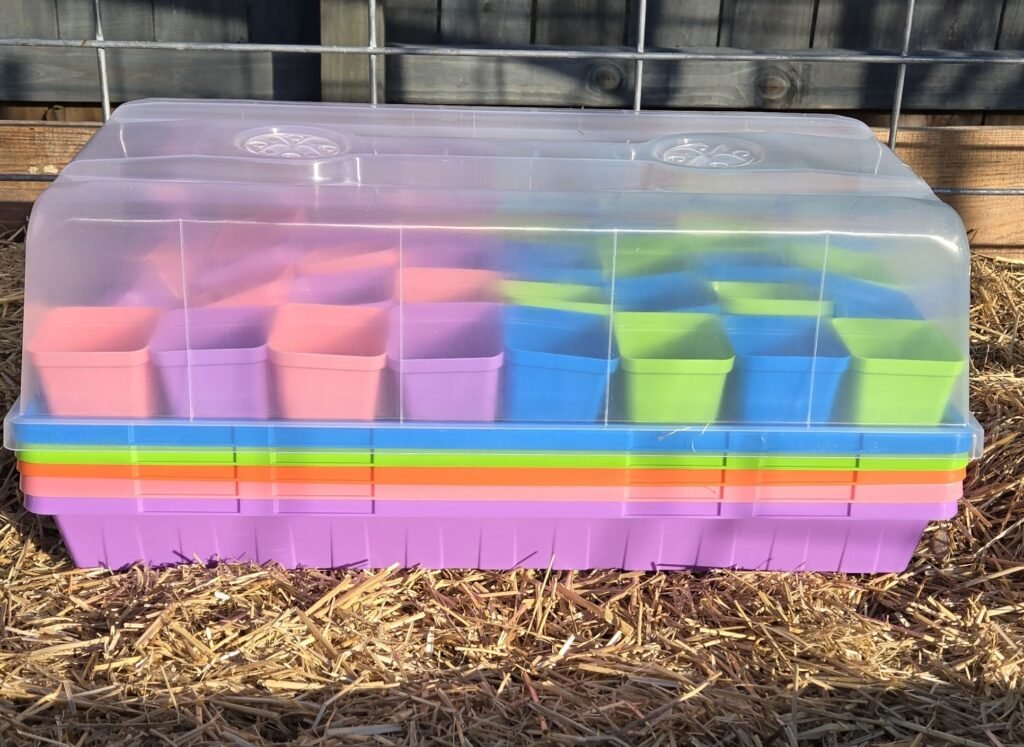
Growing trays are an essential part of seed starting in the early Spring. You need a 1020 no-hole tray, a 72-cell insert, and a humidity dome. This is your starter kit for your first garden.
On a Budget:
You can find a complete starter kit at the big box stores like Walmart, Home Depot, or Lowes.
Pros: They will run you about $7.00 a kit. This is very reasonable since you can start 72 plants in a single tray. These trays get the job done.
Cons: Trays like these are going to be flimsy. It is easy for the tray to buckle in the middle when transferring them outside – ask me how I know – I have taken a few dirt showers. And because they aren’t made of strong material, you will find holes appearing in the corners of the no-hole bottom tray. No one wants a leak over grow lights with a potential for fire hazard. One last thing about these, unless you are epic amounts of careful, the 72-cell insert is not going to last past one season. Most places don’t sell this piece by itself.
The Best:
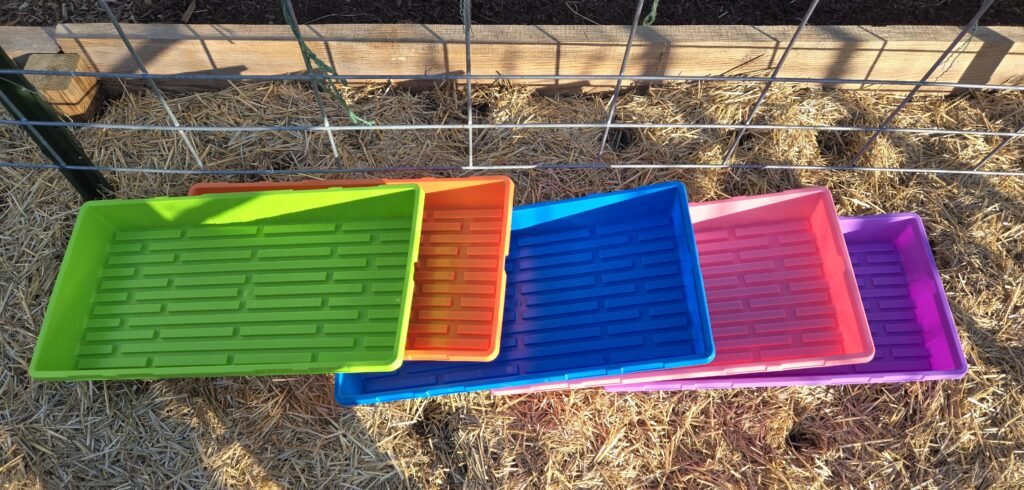
Bootstrap Farmer trays come in as the one and only for my tray needs. This is a piece by piece purchase. Trays, inserts, and humidity domes are sold separately. So one “kit” would run you roughly 27.00 before taxes. That is a 20.00 difference from the budget option above. That may seem wild and unnecessary but let’s look at the pros.
Pros: These trays are heavy duty and that is no joke – I accidentally stepped on the edge of one – no damage whatsoever. They are built to be used over and over again for years. You save money in the long run by not buying an item you have to throw away every year. No more soggy dirt showers – these trays are sturdy and will never buckle underweight. Never worry about holes where there shouldn’t be any ever again. Bootstrap Farmer no-hole trays do not leak.
Bonus #1 – Because they are BPA free and food safe, you can rest assured that your food is safe as well.
Bonus #2 – They also sell 2.5 inch pots that are also heavy duty and reusable. You will need those pots for up-potting as your seedlings grow.
Bonus #3 – Did I mention they come in fun colors?
Cons: Upfront cost may be hard to manage with these trays. However, that is really the only negative I have. I was not able to afford these my first year. They were gifted to me as a Winter Solstice present. With the price being the only con, I believe these are worth saving for as they were a complete game changer for me.
Where does one keep their growing seedlings?

Garden Tool #2: Grow Rack
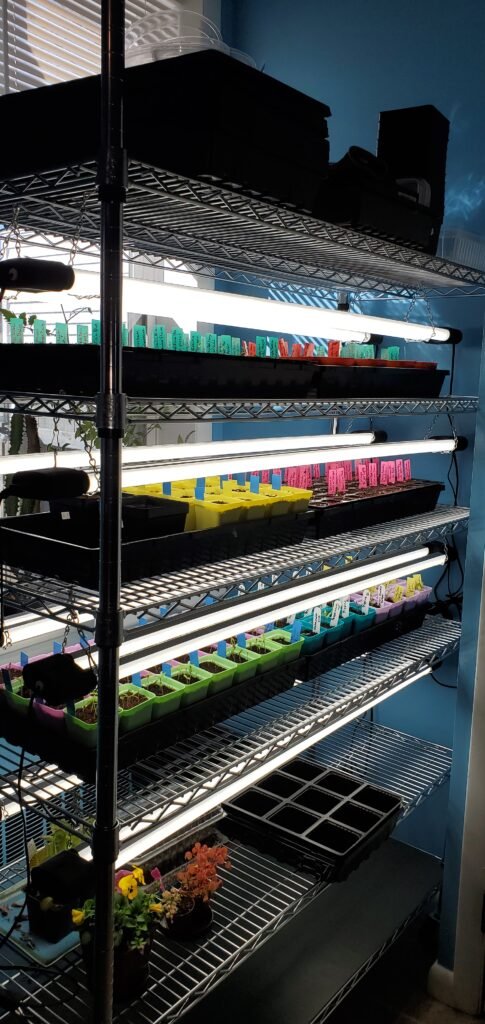
Next on the garden tools list is a grow rack. A grow rack is essential if you plan on starting seeds inside. You have to have somewhere to start your seeds with adequate lighting. Each 72-cell tray will need its own set of lights kept roughly an inch or so above your tallest plant. The lights need to be adjustable – moving them up as your plants get taller. Your grow rack needs to be able to hold the weight of your tray (soil + water). It should also be easy to access your trays daily for watering and maintenance.
On a Budget:
I started out with a portable greenhouse that came with 4 shelves – snagged it on sale for 50.00 at Tractor Supply, but they can be around 100.00 normal price. For my purposes, I left the cover off – you could utilize it for more humidity or warmth depending on your needs.
Pros: Easy to put together. Each shelf holds one tray. I’d love to say more, but that is really it.
Cons: While it held the weight – barely – the product was not very stable. I had to zip tie the shelves to the poles. I could not move this around without taking everything off – even then, a pole would undoubtedly make you chase it.
Four shelves were not adequate enough – you have to keep in mind that you have to up-pot all 72 plants if you used the whole tray – that is a lot. Another downside, shelving height was not adjustable.
The Best:
Heavy Duty Wire Shelving from Sam’s Club. A 6-tier rack runs about 100.00 – 47.75 inches wide, 18 inches deep, 75.5 tall – 6 adjustable shelves AND it has wheels.
Pros: At 47.75 inches wide, I can place (4) 1020 trays side by side on a single shelf. Their ends hang off a bit on either side, but at 800 pounds capacity on a single shelf – I am not worried. Since I cannot hang lights for the very top shelf, I use that one for garden supplies. However, that still leaves me 5 shelves – 5 shelves x 4 trays – that is 20 trays! Hanging lights from each shelf is simple with plenty of spots to attach to.
It is extremely sturdy and durable, I never have to worry about it falling over. The wheels are undoubtedly the best feature. I can move this thing around my kitchen with ease while fully loaded. Extra Bonus: If you wake up one morning and never want to start another seed again – the rack can be used anywhere in your house for multiple storage uses.
Cons: It is hard to say price is a con for this product because even the “budget” equivalent at full price costs the same. The only way you get cheaper is buying used or utilizing something around the house like an old bookshelf. It may not be to everyone’s taste. There are certainly some other style variations but those will run a higher ticket price.
Let’s transition to outside of the house.

Garden Tool #3: Greenhouse
One of the most versatile garden tools – having a greenhouse is not necessary, but it really enhances your growing capabilities. In the 2024 growing season, I did an experiment. I started tomatoes in the greenhouse in April in Zone 6a/6b. While they were slow to produce, I got a fair harvest off of those plants. This means if you don’t have room inside your home for a grow rack, you have another option for starting seeds.
I also love greenhouses for those of you who work outside the home. The reason – it allows you to harden off your plants without worrying if you have enough time to actually do so. Lastly, a greenhouse can extend your growing season into late fall and even part of winter.
On a Budget:
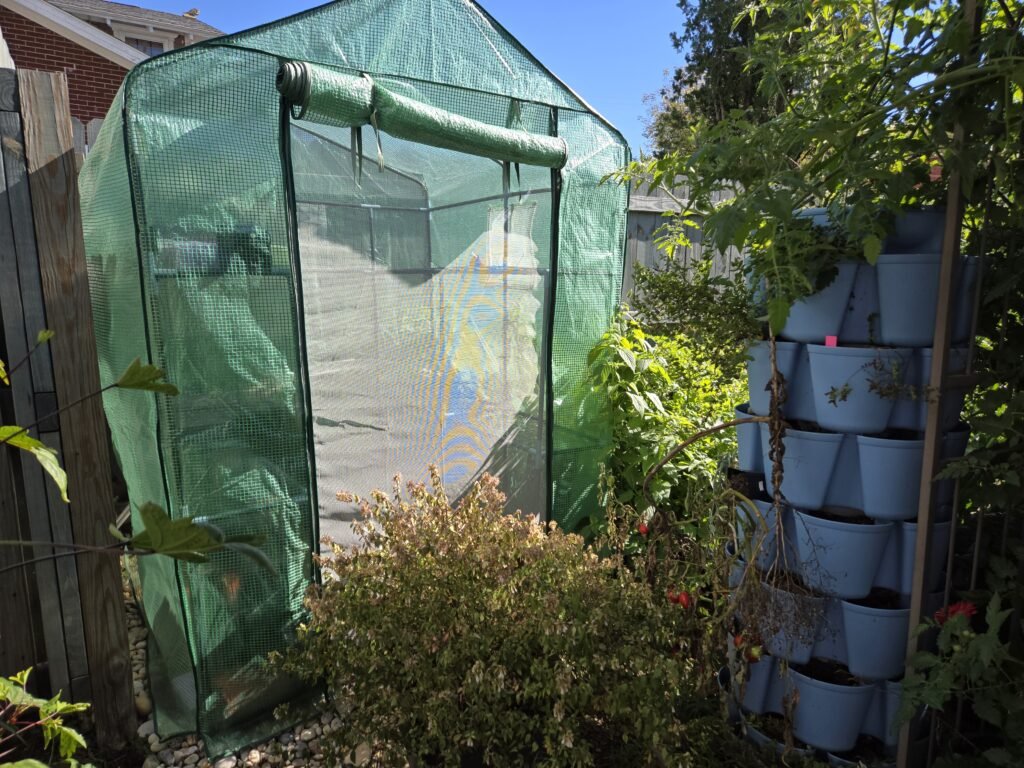
My first year, I picked up a greenhouse topper for a raised bed. I just set it on the ground and placed my plant starts inside. I upgraded to a “full size” greenhouse made in the same style, metal poles, plastic elbows, and a green zip cover. This is what I still use going into my 4th growing season in PA. The 56 x 56 inch version will run between 100.00 to 140.00 depending on the current sale.
Pros: It was simple to put up, has space for 12 trays, and has a vented door and 2 vented windows. I can harden plants off in it. I can start seeds in it. It gets the job done.
Cons: These types of greenhouses are not very stable. A good windstorm will throw your greenhouse and everything in it across the yard. It must be properly secured and even then it is a risk if you live in a severely windy area. The other big issue is pollinators get trapped inside. They aren’t smart enough to just fly out the ginormous door. Eventually, the PVC that the cover is made out of will break down and will have to be replaced. If you live in a dry climate, this may mean a yearly replacement.
The Best:
Building your own. I have not yet met this goal, so I cannot comment as to the specific materials that work the best. However, building your own greenhouse has many advantages. This may look like a combination of reusing old windows and 2x4s. You might have custom glass pieces cut. Polycarbonate panels may even be part of your design.
Pros: Customizing your greenhouse to your needs – who doesn’t want to plan out their own greenhouse? Utilizing material you already have; old windows, extra 2x4s from another project. Stability and Durability – When you build your own greenhouse you are building it to last and be able to weather any storm. Your self-built greenhouse will also likely be much warmer, therefore increasing your season extension. Remember those trapped pollinators? You could build a little exit window to let them out. The possibilities are endless for the design.
Cons: If you don’t have the materials laying around, this could be a bit of an upfront cost. Some handyman skills are going to be necessary as well. Therefore, there may be a bit of a learning curve. You may also need some extra hands to complete this project.
Overall Thoughts
The best of the best is never necessary to be successful at growing food. You can grow food with soil, water, a basic hand tool, and some seeds. I will always stand behind the route that gets you growing food the fastest. However, improving your systems over time is a nice treat to yourself. Not all of us have the entire day to devote to gardening. This means having more efficient systems in place may become a necessity in the future to continue to find success in the garden. As always, remember that no 2 gardens are alike and that is ok. Happy planting!
Want to learn more about Saving on Garden Supplies? Read the blog here.
Please note: I am not affiliated or sponsored with any of the companies in this post. I just stand by the products.
Author
liv@livlifeoutdoors.com
Related Posts
5 Easy Plants to Grow for Beginners
5 Easy Plants to Grow for Beginners Starting out can feel overwhelming, but there are some pretty easy plants to grow for...
Saving on Garden Supplies – What is in store for next season?
Saving on Garden Supplies – What is in store for next season? As you put your garden to bed and reflect on...
Simple Guide For End of Season Garden Cleanup
Simple Guide For End of Season Garden Cleanup The end of season garden cleanup is a bittersweet time. A brisk chill...
Next Garden Season: A Plan for Growth
Next Garden Season: A Plan for Growth It may seem early, but now is the time that I plan ahead for the...
How to Harvest the Best Tomatoes You will Ever Eat
How to Harvest the Best Tomatoes You will Ever Eat Harvesting the best tomatoes from the garden is what we strive for...
How to Get Rid of Garden Waste
How to Get Rid of Garden Waste Is garden waste eating away at your sanity? You pruned your heart away, weeded until...