How to start seeds inside.
How to Start Seeds Inside
You might be wondering how to start seeds inside to get a head start on the season. The idea of starting seeds can be extremely daunting to some, which is understandable given what goes into the process. However, it can also be the most rewarding part of gardening. Getting to watch a seed turn to a seedling that will later produce food in your garden is one of the most magical things. Below is a detailed breakdown of everything you need to get started and tips for success.
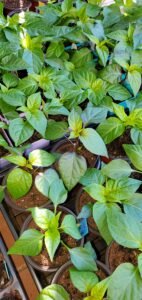
Where do you start seeds?
You need a designated space to start seeds.
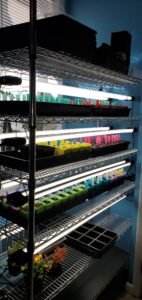
A grow rack is where your seeds will be housed until they can go outside. This needs to have enough room not only for your starter trays but also for when your seedlings need to be up-potted. A grow rack could be a bookshelf, bakers rack, garage shelving, or wire rack you have laying around.
Select a spot where it is ok for water to get on the floor and it is easy to clean up dirt. The kitchen may be the optimal spot for your growing station.
Your grow space also needs to be able to accommodate the correct lighting.
Plants cannot survive without light.
Light from a window will not be enough to keep your seedlings alive, you will need to purchase grow lights.
LED lights can be purchased on Amazon in multipacks.
Don’t fall for the “plant light” gimmick – that will cost you extra and is unnecessary.
To get started, you just need LED lights that are around 5000 Kelvins with a low wattage. Usually they run around 13 watts.
What do you start seeds in?
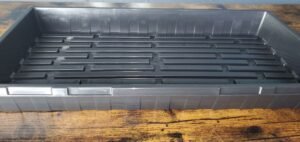
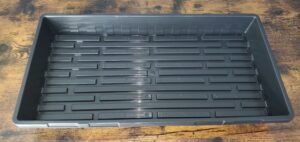
For someone just figuring out if starting their own seeds is worth it, Walmart, HomeDepot, or Lowes all carry a seed starter kit for under $6.00. It comes with the no-hole bottom tray, 72 cell insert, and a humidity dome.
While these are not made of very strong materials, they do their job and will get you through your first season.
When you are ready to upgrade, I highly recommend these trays from Bootstrap Farmer.
Up-potting
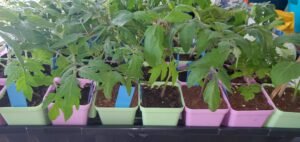
Seedlings will outgrow their small cells and need to be up-potted before they make their final destination to the garden.
Starter pots (2.5 inch) can be found at the Dollar Tree. They usually have 12-packs of round pots. If you have a local garden center, they may carry square pots anywhere from 4 cents to 15 cents each. These are going to be the pots you start your seeds in. Your first round does not have to be fancy.
Soil and nutrients
For seedlings, this is pretty simple. Grab a bag of Jiffy Seed Starter. It works and it is relatively cheap, usually under 10.00 for a bag.
Eventually, you will have to up-pot most of your seedlings before they make it out into your garden. This is where potting soil comes in. It is pricier, but your plants now need nutrients which your starter mix does not provide.
Lastly, you will need soil for your garden. Check out this blog on how to source cheap bulk soil.
The Seed Starting Process
Now that you have all the tools needed, let’s talk about the process.
-
- Your 72-cell insert tray rests inside the no-hole tray.
- Fill up your tray cells with moist Jiffy Seed Starting mix (we will talk about this below)
- Plant your seeds to the specified depth on the package.
- It is up to you on how many of each seed you sow.
- Germination rates vary and some may not make it.
- I like to put at least 2 seeds in each cell to be certain something grows. Note that this can leave you with an excess amount of seedlings if they all germinate.
- If you don’t have the space for extras, you will want to cull these upon up-potting – picking the stronger looking seedling. (May the odds be ever in their favor.)
- If you have room for extras, you could up-pot what you have and either sell or give away the extras when Spring arrives.
- Now that you have sown your seeds, cover with the humidity dome until they have begun to sprout.
- Be sure to water – we will talk about that below.
- Let the top of the soil dry slightly before the next watering.
- Once your seeds start to sprout, leave the humidity tray off to avoid any disease of the foliage.
- Sprouted seedlings will need light, so make sure you have your trays under the grow lights for at least 8 hours a day.
-
Watering seedlings
-
- Your 72-cell insert tray rests inside the no-hole tray.
- Fill up your tray cells with moist Jiffy Seed Starting mix (we will talk about this below)
- Plant your seeds to the specified depth on the package.
- It is up to you on how many of each seed you sow.
- Germination rates vary and some may not make it.
- I like to put at least 2 seeds in each cell to be certain something grows.
- Note that this can leave you with an excess amount of seedlings if they all germinate.
- If you don’t have the space for extras, you will want to cull these upon up-potting – picking the stronger looking seedling. (May the odds be ever in their favor.)
- If you have room for extras, you could up-pot what you have and either sell or give away the extras when Spring arrives.
- Now that you have sown your seeds, cover with the humidity dome until they have begun to sprout.
- Be sure to water – we will talk about that below.
- Let the top of the soil dry slightly before the next watering.
- Once your seeds start to sprout, leave the humidity tray off to avoid any disease of the foliage.
- Sprouted seedlings will need light, so make sure you have your trays under the grow lights for at least 8 hours a day.
Lighting needs
- Seedlings need light to grow and they should be kept no more than an inch away from your grow lights at any given point.
- Seedlings that are too far away from the light will become leggy and as a result may either die or not be strong enough to survive outside.
- This means as your plants grow, you will have to adjust the lights accordingly.
- You will want to take this into consideration when choosing your growing station/rack.
- Please note that if your light is too strong, it can cause the plants to burn or have stunted growth.
Seedling Strength
-
- The strongest seedlings will be the ones that survive not only up-potting but also hardening off (this will be discussed in an upcoming blog), and final transplant to the garden.
- One of the ways you can accomplish this is by gently moving your hand across the tops of your seedlings. This simulates wind and encourages stem strength.
- Some gardeners include a small fan in their set up to provide a gentle wind source.
Heat
- Seedlings need your house to be at least 65 degrees to germinate and to stay healthy until they go outside.
- Plants such as peppers would like to be warmer than the rest of your plants and will germinate much faster if provided warmth.
- You can purchase a seed heating mat to place under your trays for this purpose.
- I have a very tall and wide heat safe cover on one of my radiators (I tested for safety before doing this, please consult your local expert before trying this yourself), while my pepper seeds are waiting to germinate they stay on the radiator cover.
- Once they have germinated, they get moved off the grow rack with the lights every night to sit on the radiator until they get up-potted.
- Once they are big enough to be up-potted, they are typically ok without supplemental heat.
That was a lot of information, but if you take it step by step, I know you will have success. You are well on your way to watching your seedlings emerge from the soil. Join our Facebook group LivLifeOutdoors to get notifications for the next blog that will walk you through up-potting and hardening off your seedlings. Happy planting!
Disclaimer: I am not affiliated or sponsored in anyway. Any products that are listed in this post are from companies that I support because I trust their products.
Author
liv@livlifeoutdoors.com
Related Posts
5 Easy Plants to Grow for Beginners
5 Easy Plants to Grow for Beginners Starting out can feel overwhelming, but there are some pretty easy plants to grow for...
Saving on Garden Supplies – What is in store for next season?
Saving on Garden Supplies – What is in store for next season? As you put your garden to bed and reflect on...
Simple Guide For End of Season Garden Cleanup
Simple Guide For End of Season Garden Cleanup The end of season garden cleanup is a bittersweet time. A brisk chill...
Next Garden Season: A Plan for Growth
Next Garden Season: A Plan for Growth It may seem early, but now is the time that I plan ahead for the...
How to Harvest the Best Tomatoes You will Ever Eat
How to Harvest the Best Tomatoes You will Ever Eat Harvesting the best tomatoes from the garden is what we strive for...
How to Get Rid of Garden Waste
How to Get Rid of Garden Waste Is garden waste eating away at your sanity? You pruned your heart away, weeded until...